
In less than four years, DJI has evolved from a drone company into a brand that provides everyday tools for different kinds of filmmakers all around the world, including adventurers, and businesses, and even families.
In 2015, we announced the release of Osmo, introducing the iconic design that the handheld gimbal market maintains to this day. In 2016, we announced Osmo Mobile, a product that helped consumers better understand gimbal technology. Just last year, we managed to miniaturize this concept with Osmo Pocket.
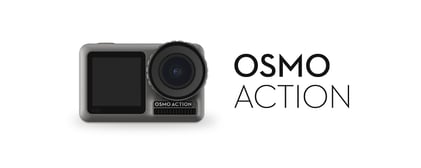
The most recent addition to our handheld cameras, Osmo Action is DJI’s first action camera. It has been creating quite a splash in the market since its release, touting dual screens, RockSteady stabilization, and a durable form factor.
We sat down with C.T. , our Tokyo-based designer for Osmo Action, to learn more about this new product.
Q: Can you briefly introduce yourself?
I joined DJI in 2017 as an industrial designer. Prior to DJI, I was working at a top Japanese camera company, developing DSLR and full-frame cameras.
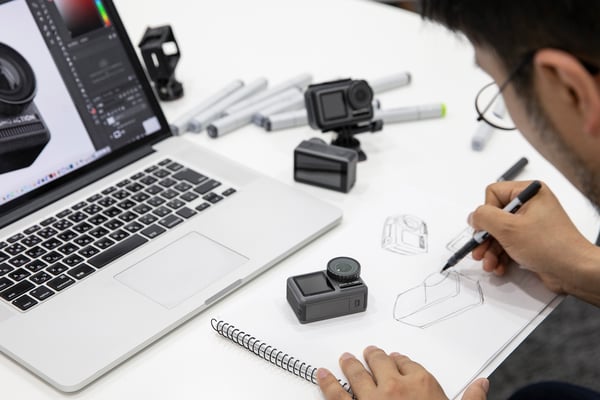
As an industrial designer, I need to ensure we deliver a product that is both useful and easy to use in many different scenarios. Hitting the nail on the head in the first try requires a tremendous amount of work ahead of time. The product needs to be truly consumer-ready when we release it. From the beginning of the design process, we need to consider product usage, integration with accessories, and every essential aspect that goes into a reliable product.
Attention to details was a must when tackling the design of Osmo Action. We wanted to make sure that this small device comes with no compromise in technological capability.
Q: When designing Osmo Action, what were the most important criteria?
I wanted to find the right combination of function and user experience. For me, this balancing act makes developing a new product incredibly challenging yet very interesting.
I always start by looking at the user experience. For example, when we decided to create dual color screens, it was a great idea, but that was just the beginning of a concept. As the designer, I needed to provide a front display whose placement and features ensure the best user experience. Is the screen big enough? Is it easily accessible? How do we want people to use it? How do we smoothly transition between the back and front screens? Without an existing front-screen action camera before us, we had to imagine a wide array of scenarios.
We also needed to go out into the field to test the different functionalities. Testing in a lab or at your desk won’t provide the real user experience. We have test teams that provide accurate feedback; with this information, we can adjust and check how the different prototypes are handling different tests.
Q: What target audience did you have in mind when designing Osmo Action?
To me, it was clear that this camera would be used by a variety of people from different walks of life. Not everyone was going to use the product for extreme sports. Some people would want a product that fits their lifestyle; for example, I would use it to record video while riding my motorbike. Some others would only use Osmo Action on a diving expedition or holiday cruise. We also tried to define user environments; we had to think of not just weekend hobbies but an overall lifestyle, which gives us valuable clues about where and how this camera would actually be used.
By defining these different personas, we tried to understand how they would use the product in each of their scenarios, shaping the product from them. Each persona would then have a specific list of criteria matching their unique activity and lifestyle.
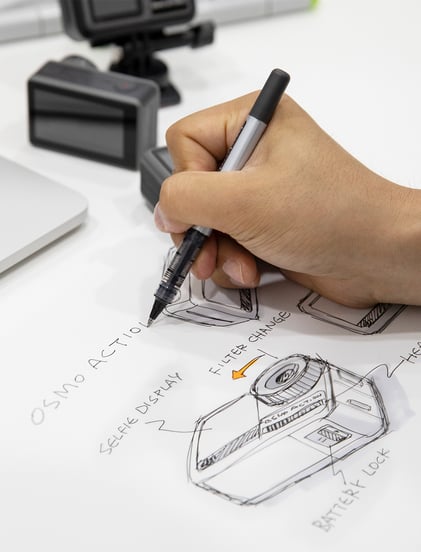
From there, we aimed to combine all these criteria with the overall direction of the product; this includes the style, the look and feel, and functionalities. One example is the QS button, which is a manual button designed for you to switch shooting modes without having to dig through the menu on the back screen. We thought about parents who already have many things to hold while trying to capture precious moments with their kids. We thought about a snowboarder who would typically have to take off their gloves to change between normal speed and slow-motion video. We wanted users to focus only on their actions and moments.
Q: Talking about dual color screens, how did DJI come up with the idea of a front screen? Was it there from the very beginning, or was it due to a market survey?
The idea popped up during the development of the product.
The concept is in line with what many people do in their free time – sharing their passion. I often record my motor biking trip with my friends. Not being able to see how I fit into the frame was often the most time-consuming factor when setting up the camera. During meetings, I found out that many of my colleagues also felt this way when using cameras. We were faced with a need, and Osmo Action’s front screen became the solution.
Q: What was the most challenging part of designing Osmo Action?
The most challenging aspect was fitting every expectation – a simple design, waterproof element, front screen – into a product of this size.
When you design a sealed or closed product, where there is no exchange between the internals and the outside environment, you need to consider additional constraints such as heat dissipation. In this case, by gaining the benefit of a waterproof camera, we lost the ability to have it cool down efficiently.
Excessive heat is never good for electronics, so our solution was the heat sink system. The row of tiny metal fins under the OSMO ACTION label are actually there to increase the exchange surface. This makes it able to extract and dispel heat from the inside of the device.
Q: Osmo Action is DJI’s first consumer waterproof product. Were there any considerations during the development stage?
Designing a waterproof product is more complex than it appears to be. In addition to heat dissipation, you need to make sure that the materials you use can handle water and air pressure. Also, the product has to be fully operational in both environments and wouldn’t suffer from changing between them.

For us, it was a new challenge as we’ve never produced a fully waterproof product for the consumer line.
The battery lock is an example of how we paid attention to the details. We added an orange mark at both ends of the battery lock so that people can quickly check whether the battery is installed properly, locked, and therefore waterproof. Small details like these add to achieving the desired result.
Q: Ruggedness is what defines Osmo Action. What are some examples of design efforts to maximize Osmo Action’s ruggedness?
On top of the waterproof feature, we designed Osmo Action to be shockproof. The original design was 100% custom-made to match these key design criteria. For example, if you take a closer look at the edges, you will notice they are round, which is because they are reinforced internally. We added features like these so that users can focus on shooting in action-packed environments.
The build quality also provides much stronger protection against both pressure and impact. We use a similar material to the fiberglass that comprises DSLR cameras. This gave us a light yet strong product for any situation.
Another part to consider is the external texture. The choice of the material is also a key point as it would affect people’s grip and greatly impact usability. Once again, user experience plays a vital role here, as Osmo Action’s multi-textured surface allows a reliable hold and tactile experience to find the different buttons without looking at the camera.
Osmo Action is the culmination of not only smart design but a determined problem-solving spirit. C.T.’s close attention to detail and consideration of every user experience turned a collection of modest blueprints into the tough, intelligent, and easy-to-use action camera that captures moments with a single touch of a button.